How to create an Azure virtual desktop (Windows 11)
Steps to setup remote desktop in cloud
I am a developer working on Pega technology, javascript. I like to learn new and emerging things.
Right now working on Google App engine to build api's for my side project.
Microsoft Azure has a virtual desktop feature that comes with Windows 11 or other server platforms and with an optional suite of Microsoft apps.
Windows 11 virtual desktops are very useful for accessing from anywhere in the world. They can be connected through the browser, remote desktop app and even on mobile devices too.
Different entities created as part of virtual desktop creation are:
Azure subscription
Resource group
Workspace
Host pool
Application Group
Virtual desktop
To start with, an Azure account is required. If not done already, a new account needs to be registered at Azure Portal. Complete the registration process (registration information, payment process etc.)
A default subscription may be created during the initial registration, either it can be used or a new subscription can be created for the virtual desktop. Call it 'AVD-SUB' for this example.
An active subscription is required to create any resource in Azure
Next, create a resource group under the subscription selected/created in the above step. Call it 'AVD-SUB-RG' for this example. After that, create a new Azure virtual network(search for "virtual network" in the Azure portal) and call it 'AVD-VIRTUAL-NETWORK'.
Make sure to select the right subscription (AVD-SUB) and resource group (AVD-SUB-RG) for this new virtual network. Select the region closest or appropriate to your usage.
Next, search for Azure Virtual Desktop and open the section. Start with creating a host pool. Select the subscription, and resource group and give it the name 'AVD-HP' for this example.
Select the host pool type as 'Personal', this will create one machine per login. Select the region same as the virtual network created in the above step. In the next steps, skip creating the Virtual machine and Workspace by selecting the option 'No' and complete the Host pool creation.
Session Hosts
To create a session host(virtual desktop), go to the host pool and select 'Session hosts' and create one.
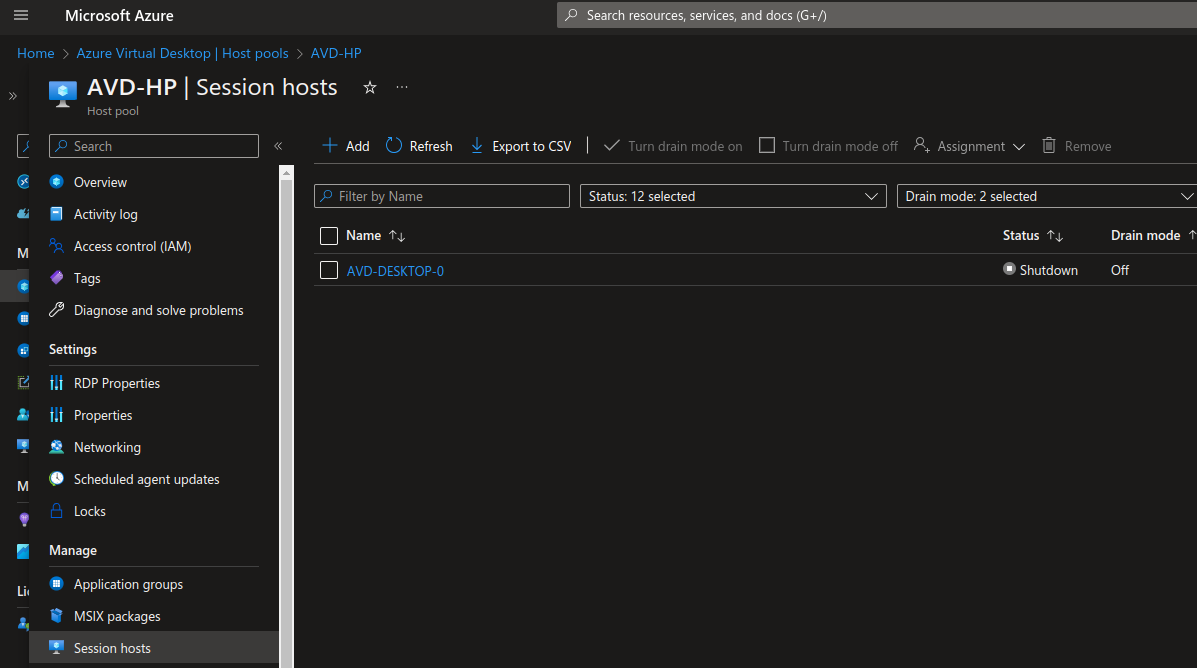
Select the same subscription, resource group and location as before.
Select the Image as 'Windows 11' (or of your choice) and the machine size according to your need.
Give the number of VMs as 1.
Select the virtual network created in the above steps.
Under Domain to join, select 'Azure Active Directory' and provide details for the Administrator account.
Leave all other settings as they are and create the virtual machine.
Now, under the host pool, select Application Groups and select the one that is created by the system. Then, go to Assignments from the menu and add a new assignment. Select the user(s) and submit.
The next step is to assign a role for these user(s) to access the virtual desktop. For that, go to the resource group (AVD-SUB-RG) and select Access Control (IWM) from the menu.
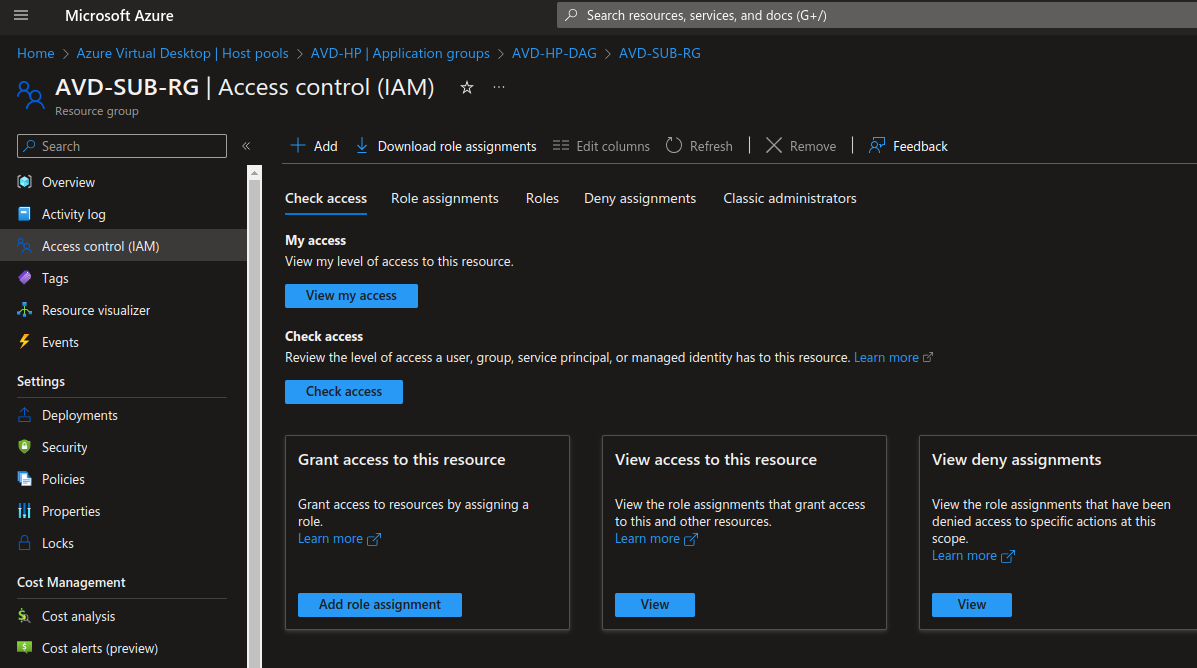
Go to Role assignments and add a new role assignment. Select 'Virtual Machine User Login' and add the user(s) under members. Review and complete the assignment process. Repeat the role assignment for 'Virtual Machine Administrator Login' to assign admin user(s).
Workspaces
Workspace is a section to host the remote desktop and any other apps. These will be accessed from the web session or through an app. To enable remote desktop for the virtual desktop created, it needs to be listed in the workspace.
Go to Azure Virtual Desktop and navigate to Workspaces from the menu.
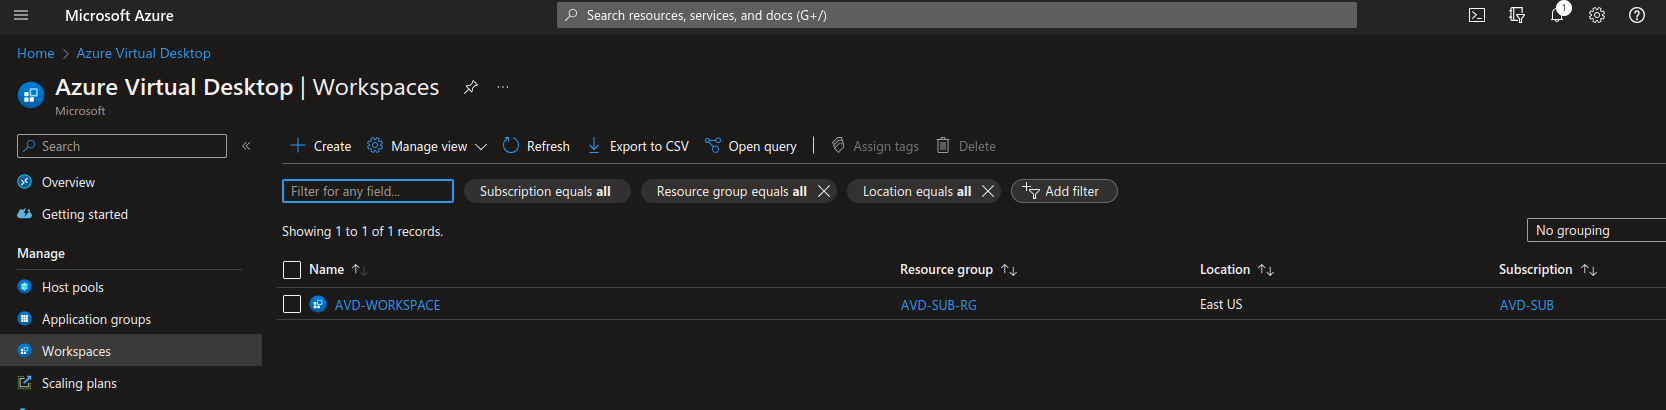
Add a new workspace, select the right subscription, resource group and region and finish the creation process leaving other settings as is.
Now, go to the newly created workspace and navigate to Application Groups from the menu. Add a new Application group and select the one created by the system as part of Session host creation and finish the process.
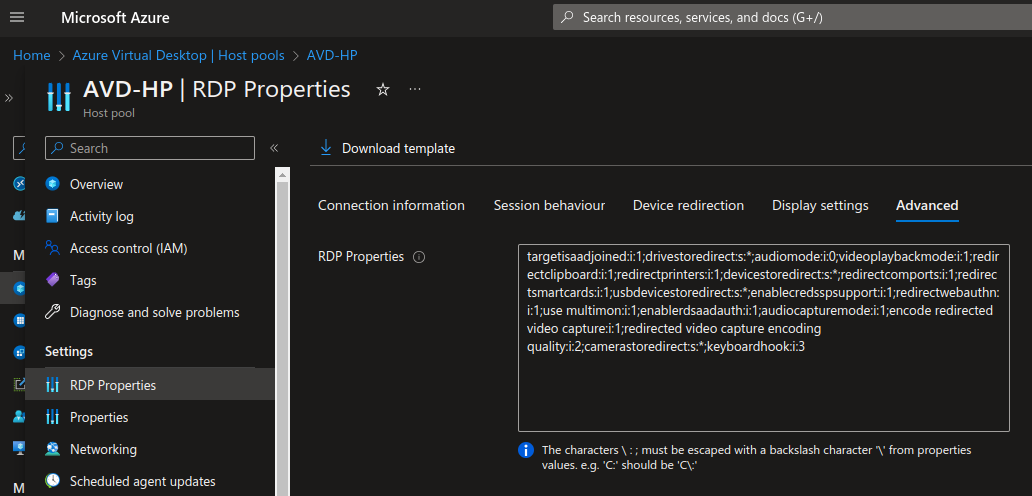
RDP Properties
Go to the host pool and select RDP Properties from the menu. Here you can alter the settings for how the virtual desktop should work and perform. One important step is to make sure a specific setting is there in the Advanced section.
Check for the setting targetisaadjoined:i:1; under RDP properties under the Advanced section. If not already present add this to the beginning of the text present in the box.
Now all the steps are completed. Make sure the virtual desktop is created and running (host pool dashboard page)
Launch the virtual desktop
Go to https://aka.ms/avdweb
Login with virtual desktop credentials provided.
The desktop will be displayed under Workspace.
Click and it will start a remote session to the virtual desktop.
If needed login with the user credentials created during setup.
Hope you got the setup right and can launch the desktop successfully. There are also some youtube tutorials on setting up the Azure Virtual Desktop. Check them too.
https://www.youtube.com/watch?v=jMAanEp-ugI&t=60s
If you are Enterprise level systems administrator, you may want to check this book on how to manage Azure Virtual Desktop Environments. Link to Book
Feel free to leave a suggestion or comment. Thank you until next time.